
Sometimes inspiration can be hard to come by. We have known for a while that we’ve wanted to make a nightlight, but didn’t know how to make it different from all the rest.
We stumbled across an interesting video on YouTube which peaked our interest and gave us the inspiration we needed. How awesome would this nightlight look if we added a whole heap of Sparkles (a Matrix display) and gave it a Crumble kick?!
The Crumble-powered RGB nightlight was born.
Although this post will be a whistle-stop tour of the process, when we have our finished Sparkle Matrix display, we will definitely work on some in-depth instructions and teaching resources.

We started off by preparing a cardboard box, by removing all of the sellotape. We then glued it back together, to make sure that it was sturdy.

We then cut the faces of the box off, leaving a border. This would give us the frame for our light.

After this, we drew some straight lines on a word document and printed off 5 copies. We then trimmed each sheet so that it could be glued inside the 5 faces of the frame.

When we had finished our light, we decided that we didn’t like the bare cardboard, so we used a silver permanent marker to give it a metallic look.

Wiring up the Crumble was simple enough. After connecting the Sparkles (inside the shade), we connected a light-dependent resistor (LDR). One end connected to a + output, in this case from the batteries, and the other end connects to an input (A, B, C or D). We used A.
It’s really easy to use an LDR with the Crumble. Take a look at the following program. When the analogue value of the LDR (we’ve renamed it to be helpful) is above 90, turn all of the Sparkles off, if it isn’t above 90, and therefore less than it, then turn the Sparkles on.

To get the nice RGB effect, we have cycled through the red, green and blue values. This graph shows how increasing or decreasing the different values gives us different colours. Doing it in this particular order gives us a lovely rainbow effect!

We have created variables called Red, Green and Blue. We then set the corresponding red, green and blue Sparkle values to our variables. We have cycled up/down the RGB values to give us our transition of colours. Each time the colour changes, we check to see the value of the LDR, and whether or not to turn the lights on/off.

And here is our RGB nightlight, in all of its glory! When the Sparkle Matrix gets finalised, we will create some more in-depth teaching resources for this project, as it’s easy to make and really satisfying.


 At the start, all the Sparkles are turned off. The Crumble waits for a random period of time (between 2 and 6 seconds) and then begins lighting the Sparkles in quick succession (every 50 milliseconds). The aim of the game is to press the switch as quickly as possible. Note: you have to hold down the switch until you have read your “score”. When the switch is released, the game restarts. Joseph & I discovered that, after a bit of practice, we could consistently press the switch after 4 or 5 Sparkle LEDs had lit up (i.e. after 150-200 milliseconds).
  For a fair test, you have to close your eyes while playing – but remember to open them and read your score before releasing the switch! Now we found that we could press the switch after 3 LEDs were lit (100 ms).
 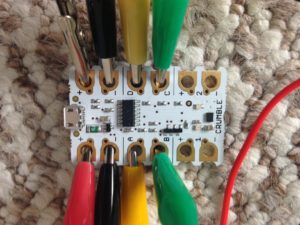 We used:


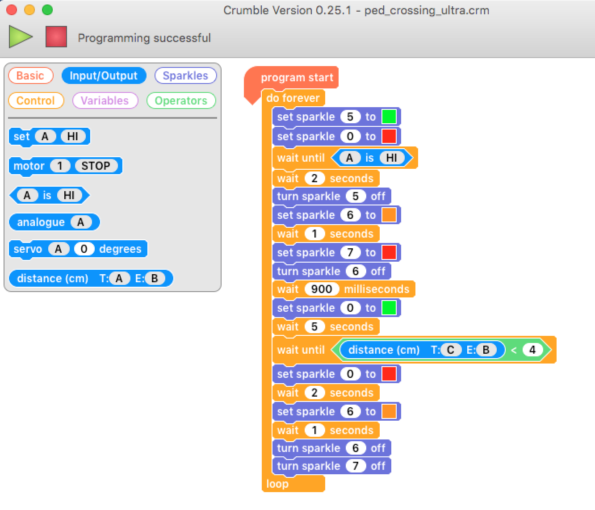

 We used:


 The variable “t” is the index number of the Sparkle. The variable “u” switches between +1 and -1 every 8 steps, so the “let t=t+u” command increments the Sparkle number from 0 to 7 then decrements it back to 0. At each step, Sparkle “t” is set to red for 100 milliseconds. This whole sequence is placed inside a “do forever” block.
 When the button is pressed, the program will pause until it is released (“wait until B is LO”). If the user has succeeded in pressing the button when the green LED is lit they have “won”.


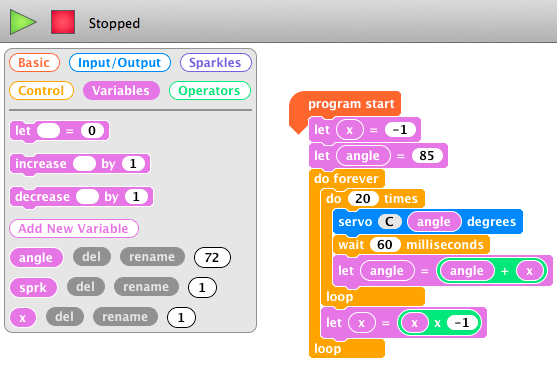 We wanted the Sparkle strip to change colour at the same time as the servo is moving. As there are 20 steps in the loop to move the servo, the simplest way to do this was to use only 20 of the Sparkles. We defined a variable “sprk” to be the index number of the Sparkle. Every time the loop is executed, Sparkles 5 to 25 are set to red, in turn. Variable “x” is used to set the adjacent Sparkle to green. Once we were happy with the effect, we disconnected the Crumble from the computer and placed our decoration on the fireplace.
  Can you improve on this and work out how to thread two programs together to use all 30 Sparkles? Merry Christmas!!


